As the saying goes, “By failing to prepare, you are preparing to fail. This is especially true when it comes to painting walls. Knowing how to prepare a space will yield smooth walls before painting.
Spending more time and attention on prepping your walls before painting will produce a much superior finish. Here is a guide to learning how to prepare walls for painting in order to achieve a smooth and streak-free paint application. Remember that investing time in painting preparation now will help you prevent regrets in the future.
Ways to Prepare Your Wall For Painting After Removing Wallpaper
You could paint over the wallpaper, but you can’t expect the finish to be optimal. With that, removing the wallpaper beforehand is preferable. Depending on the type of wallpaper, these surfaces may require a bit more effort since you must ensure that all the wallpaper is removed. Self-adhesive wallpapers can be taken off without soaking or special tools. However, wallpaper pasted at the back of the paper must follow the instructions below.
Materials needed:
- Stripping knife
- Sponge
- Bucket
- Wallpaper stripping solution
- Steam stripper
- Sandpaper
- Sugar soap
Step 1 – Score the wallpaper diagonally using a stripping knife, be careful not to penetrate the plaster behind.
Step 2 – Soak the wallpaper to make it simpler to remove with a sponge and hot water. Wet a few meters at a time and let it soften for five minutes.
Step 3 – Remove the paper from one of the cuts with a wide stripping knife. Continue this procedure until all paper has been removed.
Step 4 – If the wallpaper is difficult to remove, try a wallpaper stripping solution that dissolves the wallpaper paste. Soak the paper in the solution, wait a short time, and then remove it with a knife. You could also try using a steam stripper by filling the tank with water, plugging it in, and turning it on to drive steam through the line.
Step 5 – Once most of the paper has been removed, you maybe left with small bits of paper attached to the wall. If it cannot be removed with a stripping knife, try a sheet of sandpaper.
Step 6 – Lightly sand the walls with a new piece of sandpaper.
Step 7 – Use a sugar soap solution to remove any oil, crayon, or mucky fingerprints. Apply the sugar soap on the walls while wearing gloves. You may ask should you wash the walls before painting? The answer is yes, to remove soap traces. After doing this, allow the walls to dry completely.
Ways to Prepare Newly Plastered Wall Before Painting
A newly plastered wall is perhaps the easiest to paint on. Simply apply a primer and undercoat with a roller to obtain the optimal surface. If you do not prepare the surface with a sealer before painting, the plaster will absorb the paint like a sponge, causing you to waste paint and apply more coats than necessary. Allow all exposed or freshly applied plaster to fully cure before decorating. You can tell when the paint is dry because any black patches disappear, and it develops a pale pink/gray color.
Ways to Prepare Old Walls Before Painting
Preparing previously painted walls for a new coat of paint is quite simple, but there are some easy ways to paint walls and ensure a professional finish.
To fill any gaps or cracks.
Materials needed:
- Sugar soap
- Flexible filler
- Flexible filling knife
- Fine sandpaper
Step 1 – Clean the gaps with sugar soap before filling, as dust may prevent the filler from adhering to the wall.
Step 2 – Using a flexible filling knife, press the filler into the opening until it is flush to the wall.
Step 3 – Allow the filling to dry before sanding it with fine sandpaper.
To sand the walls.
Materials needed:
- Fine sandpaper
Using a new piece of fine sandpaper, lightly sand the walls and any flaking paint. This provides roughness to the wall, which helps the paint adhere to the surface.
To wash the walls.
Materials needed:
- Sugar soap
- Sponge
- Gloves
Remove any oil, crayon, or grimy fingerprints using a sugar soap solution. This is available as pre-mixed or as a solution to be diluted with water. Employing gloves, apply sugar soap on the walls. Once all walls have been cleansed, rinse the surface with warm water to eliminate any soap residue. Allow the walls to dry out thoroughly.
Steps to Paint a Wall
Wash the walls.
To clean your walls of dust, grime, and oil, use a large cellulose sponge with a solution of water and a few drops of mild dishwashing solutions.
Put painter’s tape.
Use blue painter’s tape for areas you don’t want paint on, such as molding, trims, light switches, doorknobs, electrical outlets, windows, and door frames.
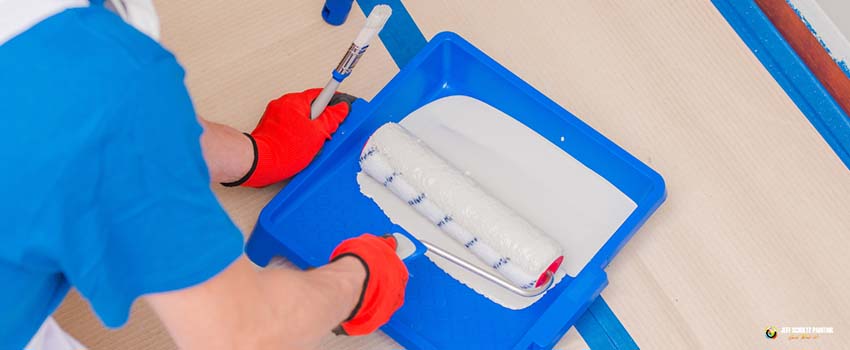
Fill the tray with primer.
Pour enough paint to fill the well at the bottom of the tray without covering the angled area with the ridges.
Apply the primer to the wall.
Roll the roller back and forth several times across the tray’s ridges to remove the excess primer and avoid drips. Ensure that the roller is coated evenly. Apply primer by rolling it up and down the wall until the section is completely covered. Continue until the entire wall is coated, reapplying primer to the roller as necessary.
Use a brush in areas you can’t use the roller.
With a 2-inch angled brush, apply paint around the trim and in corners of walls where your roller cannot reach.
Determine when the paint is dry.
Different types of paint dry at different rates, and they should feel dry to the touch before you may apply a second layer. Latex-based paint will feel dry to the touch in about an hour and be ready for a second layer. On the other hand, it takes six hours for oil-based paint to feel dry and a day before you can apply the second layer.
Strip the painter’s tape.
To avoid mistakenly removing any dried paint along with the tape, peel it off while the paint is still wet.
Conclusion
Get one step closer to painting like a pro by learning how to prepare walls before painting. It would be best to follow the necessary steps and prepare the materials needed to deal with various interior surfaces. Moreover, consider all the tips and techniques mentioned above to guarantee a smoother finish and a successful DIY painting job.
Paint Like A Pro From Jeff Schultz Painting
By learning the easy ways to paint walls and the methods to follow in preparing them, your DIY home improvement project will be a piece of cake. However, if you lack time to carry it out, you can always engage the services of Jeff Schultz Painting, the top painters in Sarasota FL. We are the best in the market to deliver quality results on time with the highest satisfaction from our clients. So, call us now for an estimate.